Art can present us with creative challenges, and sometimes one of them is the drying out of oil paints.
Dry tubes and palettes may seem like an unpleasant surprise, but don’t despair. In this article, I will explain how to effectively restore dried oil paints and give them a second life.
Composition and properties of artistic oil paints
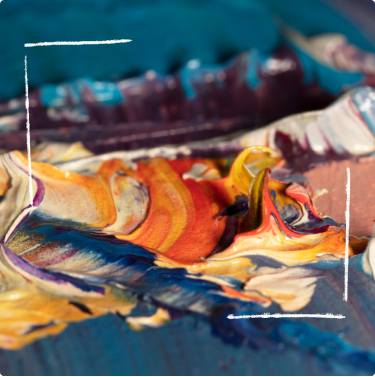
We love oil paints for their vibrant, rich colors, their ability to create various textures, and their versatility. An artist cannot do without paints—an indispensable tool for creators of all skill levels. Let’s take a look at the composition and main properties of paints.
Composition of Oil Paints
Oil paints consist of three main components: pigments, oil, and thinners.
 Pigments:tiny particles that give paints their color. Pigments can be organic or inorganic and offer the artist a rich choice of color palette.
 Oils:linseed oil is mainly used, known for its excellent drying properties. Oil gives the paint its viscosity and allows it to easily “lay” on the canvas surface.
 Thinners:are used to adjust the consistency of the paint. A thinner is added to the paint to make it more liquid and easier to work with. Thinners can be solutions based on mineral oils or alcohol.

Properties of oil paints
- Drying:the main advantage of oil paints is that they dry slowly. This feature allows the artist to work on the artwork for a longer time and create various effects on the painting—gradients and more complex textures.
- Durability:oil paints have high color durability, meaning they maintain their original hue and intensity over a long period of time.
- Thickness and Consistency:oil paints can be thick and dense or thin and transparent—depending on the oils and thinners added. The thickness allows the artist to achieve various styles and effects.
- Gloss and Matte:oil paints have varying degrees of gloss and can even be completely matte.
- Mixability:artists mix oil paints, creating smooth color transitions and new shades in their paintings.
- Textural Possibilities:oil paints allow for the creation of diverse textures on the canvas—through brushstrokes, marks, or palette knives.

Techniques for working with oil paints
Keep this in mind if you’re new to painting:
- Glazing:each layer is applied after the previous one has dried, creating a layered effect.
- Impasto:paint is applied in thick layers, giving the painting an illusion of volume.
- Glaze:paint is diluted with oil or a solvent to create transparent and lighter shades.
Working with oil paints requires patience, creative imagination, and an understanding of their characteristics. In their variety and possibilities lies boundless creative freedom, opening up new horizons for artists.
Oil paints: advantages and disadvantages
Painting is one of the oldest forms of human creativity. Over time, artists have used various materials to create their works. However, the most popular material remains oil paints. In fact, they are still in high demand today.
The undeniable advantage of oil paints is their rich and vibrant color. Oil paints produce a deep and glossy surface that gives the artwork a special effect and a sense of realism.
Oil paints can be mixed and thinned with solvents, allowing the artist to adjust the desired consistency and texture of the painting.
Another benefit of oil paints is their durability. They retain their brightness and quality even after years and decades, making them ideal for creating artworks that will last for many years and delight future generations.

However, there are also drawbacks. Oil paints take a long time to dry, which can be a disadvantage if the artist requires quick or immediate work. Additionally, oil paints can have a distinctive smell—this odor is often unpleasant to people, especially those working in enclosed and poorly ventilated spaces.
If you are painting with oil paints, be cautious: follow safety instructions to avoid adverse health effects.
This era brought a burst of hues and color transitions to the art world, which continues to inspire artists today.
Methods for restoring dried oil paints
Imagine the following situation: you’ve long dreamed of painting and bringing your creative idea to life, bought paints, but struggled to start. Finally, the moment has come when you have both time and inspiration—you’ve begun creating your future masterpiece.
However, you suddenly discover that your oil paints have dried out. What to do in such a situation? Should you throw away the old paints or attempt to revive them, giving them a second chance?
I know for sure: the creative spark should not be extinguished just because of an unexpected obstacle like a dried-out tube of oil paint. Paints can be revived!
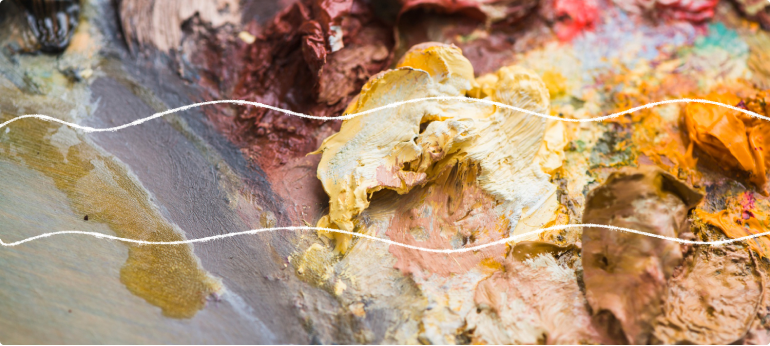
- Assess the condition: if the paint has become thick and unyielding, don’t despair—there are several methods that can help restore its usability.
- Use thinning agents: linseed oil or turpentine can be helpful. Just a few drops added to the tube will restore the paint’s consistency.
- Heat treatment: if the oil paint has become too thick, you can use heat treatment. Warm the tube briefly in warm water or wrap it in a hot towel. This process will help soften the paint and restore its flow.
- The art of revival: don’t be afraid to experiment with different methods: for example, add a few drops of oil medium, experiment with temperature—sometimes, bringing paint back to life requires patience and a creative approach.
- Prevent drying: to avoid such situations in the future, always close the tubes after painting sessions and store them in a cool place.
Yet, view this as a lesson and a reminder of the importance of careful handling of your paints, as it affects not only their preservation but also the quality of your art!
Storing artistic oil paint

- Avoid extreme temperatures: oil paint, as a true work of art, loves moderation. Never store it where temperatures can rise to high levels or, conversely, drop to freezing. Avoid places near radiators, air conditioners, or windows exposed to direct sunlight. The optimal storage temperature is between 15°C and 25°C.
- Care for humidity: oil paint doesn’t like moisture just as much as people dislike getting wet in the rain. Store it in a dry place to avoid condensation inside the tube. The ideal humidity is between 40% and 60%. You can use additional humidifiers or dehumidifiers.
- A dark refuge for paints: light is not always a friend to paints. Oil paints are sensitive to light, especially ultraviolet rays. Store your creations in a dark place to prevent changes in color and texture. Dark drawers or cabinets are your reliable allies.
- Screw it, screw it, and screw it again: what could be worse than going out to paint en plein air and discovering that your paint tube has dried out due to a loosely closed cap? Always check if the tube is sealed tightly. Or use a paint key—a trusty tool in the battle against drying out.
- Separate colors, combine ideas: keep separate drawers or containers for different paint colors. This will not only help you find the needed shade more easily but also prevent mixing of paints in case of leaks or packaging damage.
By following these simple but important rules, you can keep your oil paints in excellent condition, ready to bring life to artistic masterpieces. And remember, proper storage is caring for your creativity, and every stroke counts!
Question-answer
If your oil paint tube has dried out, you have several ways to revive it:
- Use special solvents: there are special solvents for oil paints that help restore a dried-out tube. Simply apply a small amount of solvent to the top of the tube and leave it for a while. Then, gently mix the paint with the solvent using a knife or brush. Remember to be cautious and work in a well-ventilated area, as solvents can be toxic.
- Add oil or mediums: if you don’t have a special solvent, you can try adding a small amount of oil or medium to the dried-out tube.
- Transfer the paint to a palette: if the dried paint cannot be revived, you can transfer it to a palette and use it as acrylic. Just squeeze the contents of the tube onto the palette and mix with water to achieve the desired consistency. This way, the dried paint can gain new life.
Don’t worry if your oil paint tube has dried out. You can try to revive it and get it back to work—so you can paint with your favorite colors and create beautiful works of art again.
The Secret of Water: mixing water with oil paints is like a dance of two elements. But be careful, as too much water can create chaos! Gradually add water until your paint becomes workable and ready for a new creative journey.
Or…
Linseed Oil: try adding a few drops of linseed oil to the dried paints. This will not only thin them but also give your work a shine and depth.
And, of course, remember oil solvents: use special oil solvents to smoothly revive your paints. It’s like magic — a few drops of solvent, and your paint will come alive like a restless volcano!
- Turpentine: adding a small amount of turpentine can help soften oil paints. Be careful with the quantity to avoid overdoing it.
- Water-Based Oil Paints: consider using water-based oil paints. They are usually less thick and dry faster, making it easier for the artist to work.
- Warming: before painting, place the tube of oil paints in warm water. Warm paints are easier to smooth out and apply.
- Mix Well: thoroughly mix the paints before use. Sometimes even simple mixing makes them more workable.
If your palette has turned into something resembling a stone texture, don’t despair. It’s quite possible to restore oil paints.
- Oil Restoration Products: special products available in art supply stores can help restore the original consistency of oil paints. Just add a few drops to the dry paints, mix them, and give them time to recover.
- Linseed Oil: adding a small amount of linseed oil can revive dried paints. However, be careful and add the oil gradually to avoid making the paint too liquid.
- Plasticizers: some artists prefer to use special additives that make oil paints more pliable. These additives help to mix the paint more easily and restore its flexibility.
- Use of Solvents: solvents, such as turpentine, also help to soften dried paints.
- Applying an Oil Sheet: if you have the time and patience, you can lay an oil sheet between layers of dried paint — it will help restore the freshness of the paints.