What is underpainting: secrets and techniques of art in the world of painting
“Podmalevok”—admit it, it sounds funny. Probably, there isn’t a person who wouldn’t smile upon hearing this amusing word. It feels like it was invented by a child—it’s such an unusual word. In reality, it is an important term in painting.
So, what exactly is a podmalevok? It is the preparation or first stage of creating a work—a painting that is about to be born from the artist’s brush.
Why is such preparation needed at all? Can’t you just take and draw a picture directly on the canvas, then immediately cover the whole painting with paint, and then work on the details? You can, but if you want to create a detailed painting, a podmalevok is indispensable.
Let’s dive into the fascinating world of podmalevoks, where color and form combine in harmony, and the painting begins its life long before the first glance falls upon it.
Underpainting in the work of a beginner and professional artist
Podmalevok can be considered a kind of “blueprint” before the artist begins working with the main colors and details.
It can be done in a monochromatic way or with the use of color accents, depending on the style and preferences of the artist.
It’s fascinating to observe the development and progress of artists through the podmalevoks in their work.
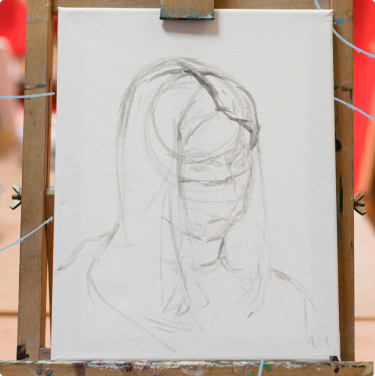
A beginner artist, in the process of learning and mastering various techniques and styles, often uses underpainting to study proportions, tone, and light in their works. Beginner’s underpaintings are often rough but have the basic shapes and outlines representing the overall composition of the future work.
Underpainting helps the beginner artist better understand the structure and depth of the object, as well as conduct preliminary experiments with light and shadow.
A professional artist’s underpaintings are more detailed and complex. Masters create underpaintings that are precise and realistic, down to the smallest elements and conveying the mood of the piece.
Professional artists also use underpainting to experiment with color, texture, and various paint application techniques.
Beginners often struggle with correctly depicting perspective in their underpaintings, and they may distort the proportions of individual elements.
Professionals, on the other hand, achieve more accurate perspectives and well-maintained proportions.
However, underpainting is not always an essential part of the artistic process. Some artists prefer to start directly with the main work without preliminary sketches, painting directly on the canvas. This allows them to express more freedom and expressiveness in their creativity.
Every artist has their own style and approach to work, so it’s up to you whether or not you will use underpainting. But as an experienced artist, I would recommend not skipping this stage of the creative process—thanks to underpainting, you will learn to paint more consciously, pay attention to each element, distribute space on the canvas more effectively, and ultimately achieve skilled and meticulous artwork.
The role of underpainting in painting
Underpainting in painting can be compared to the foundation of a building—it is the base upon which a work of art is constructed. This stage plays a key role, influencing the final result of the entire painting.
Underpainting performs several important functions. First, it creates a dense and stable surface for the subsequent layers of paint.
Second, underpainting serves as a kind of “framework” for the future work. The artist uses it to determine the composition, distribution of light and shadow, main shapes, and lines. It is like a draft, allowing the artist to experiment and correct flaws before starting work on the details.
Additionally, underpainting can influence the color scheme of the painting. It shows through the top layers of paint and gives them a certain tint or warmth. A painting with this effect becomes more interesting and deeper.
I call underpainting the “hidden hero” in the world of painting. Although viewers do not see it, its influence is felt at the level of aesthetics, durability, and artistic expression. This thin layer, like an invisible foundation, supports the entire basis of the artistic creation.
Practice on small paintings—this way you can delve deeper into the technique of underpainting without overloading yourself with excessive information.

Underpainting: psychological significance for the artist
Underpainting in the art world is not just a preliminary stage of work, but a true psychological and creative territory for the artist. It is a place where ideas are born, emotions flow, and the interaction between the artist and the canvas begins.
From a psychological point of view, underpainting is a kind of diary for the artist. Here, on an empty canvas, the creator expresses thoughts and feelings, trying to capture that moment of inspiration that led to the creation of the work. This stage can be compared to the artist having a conversation with themselves, trying to uncover the essence of their idea and bring it to the canvas.
By creating the initial strokes, the artist frees the mind from constraints, allowing the creative flow to move freely. It is akin to meditation, where one dives into their inner world, communicates with themselves, and finds inspiration in the deepest corners of their consciousness.
Thanks to underpainting, the outlines of the future work are formed, and each stroke gains its own meaning. It can be said that underpainting is a psychologically rich area of work where the artist interacts with themselves, their inner world, and the future artwork.
Underpainting provides an opportunity not only to create a beautiful painting but also to reveal deep layers of creative potential.
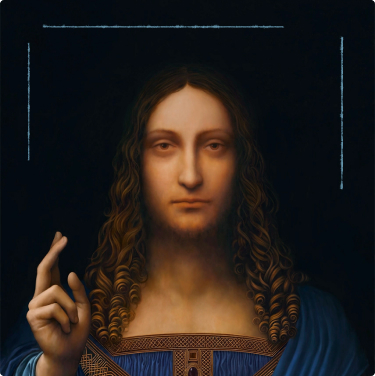
He used the underpainting method to study light and shadow, anatomy, and movement.
A remarkable example is the underpainting for his famous painting “The Last Supper.” Leonardo created numerous small sketches and drafts, studying the poses of the apostles and their expressions.
He also conducted detailed studies of light and shadow to achieve maximum realism in the depiction. This method provided him with a deep understanding of anatomy and mastery in conveying emotions, making him one of the greatest artists of the Renaissance.
History of underpainting in painting
Since the inception of painting, underpainting has laid down its ancient groundwork, like fertile soil ready to absorb the dreams and ideas of the artist. Over time, however, artists have begun to use underpainting not only as technical preparation but also as a means of conveying emotions and atmosphere.
During the Renaissance, masters like Leonardo da Vinci and Michelangelo discovered that underpainting could be more than just a base layer; it could be a subtle chord, giving the work harmony. Just as the first note in a symphony sounds, so too does underpainting foreshadow that a painting is about to unfold.
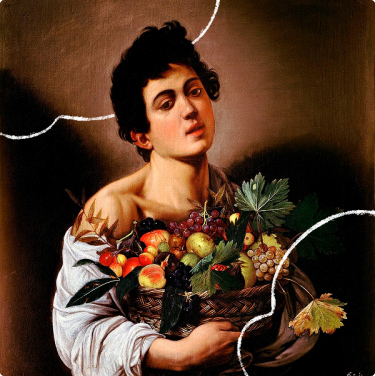
In the Baroque era, underpainting became the hidden co-author of great works. Caravaggio, with his virtuoso play of light and shadow, used underpainting to convey special depth and tension in his canvases. It was a play not only of color but also of hidden echoes, mysteriously shimmering beneath the thin layer of paint.
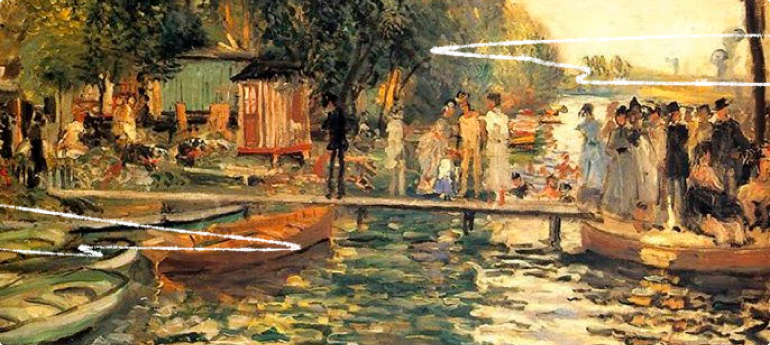
With the advent of Impressionism, artists began to see underpainting not as a preliminary stage of work, but as a key to conveying fleeting impressions. Each brushstroke became an important chord in the symphony of light, and underpainting was the invisible accompaniment, giving the painting its emotional hue.
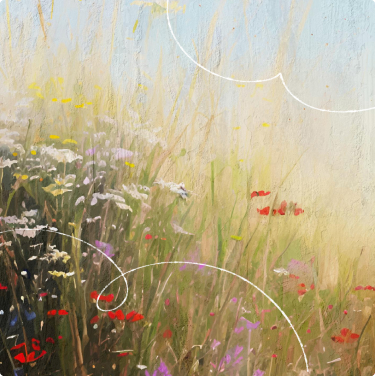
Today, underpainting continues its mysterious existence in the world of contemporary art. Artists experiment, creating unique combinations of materials and textures, revealing new facets of artistic expression.
Before us is a kind of introduction to the world of art, where underpainting is not just a preparatory stage but a part of the inspiring journey into the world of colors and forms.
Since the dawn of painting, underpainting has laid its ancient foundation, like fertile soil ready to absorb the dreams and ideas of the artist. Over time, however, artists began to use underpainting not only as technical preparation but also as a means of conveying emotions and atmosphere.
In the Renaissance era, masters like Leonardo da Vinci and Michelangelo discovered that underpainting could be not just a base layer but also a subtle chord, giving the work harmony. Just as the first note in a symphony sounds, so underpainting is a prelude to the unveiling of the painting.
In the Baroque era, underpainting became the hidden co-author of great works. Caravaggio, with his virtuoso play of light and shadow, used underpainting to convey special depth and tension in his canvases. It was a play not only of color but also of hidden echoes, mysteriously shimmering beneath a thin layer of paint.
With the advent of Impressionism, artists began to perceive underpainting not as a preliminary step but as a key to conveying fleeting impressions. Every brushstroke became an important chord in the symphony of light, and underpainting—an invisible accompaniment giving the painting an emotional hue.
Today, underpainting continues its mysterious existence in the world of contemporary art. Artists experiment, creating unique combinations of materials and textures, revealing new facets of artistic expression.
Before us lies a kind of introduction to the world of art, where underpainting is not just a preparatory stage but part of an inspiring journey into the realm of colors and forms.
He meticulously ground the shells and added them to the primer, giving his works extraordinary smoothness and durability. This method seemed to be the master’s secret weapon, making his works particularly attractive and resistant to time.
Rules for creating underpainting with different paints (watercolor, gouache, oil paints or acrylic)
Creating an underpainting is an exciting and creative activity that allows you to experiment with different types of paints — watercolor, gouache, oil paints, or even acrylics.
Here are some interesting and valuable rules that will help you apply a unique underpainting with various paints. My step-by-step guide:
![]() Choosing the Surface:
Choosing the Surface:
Choose a suitable surface for the underpainting. It could be canvas, watercolor paper, cardboard, or other appropriate materials. Remember that different surfaces affect paint absorption and texture.
![]() Preparing the Surface:
Preparing the Surface:
Prepare the surface before applying the underpainting. If you are using paper, stretch it on a backing or secure it to a board. Canvas should be primed beforehand to create an even foundation.
![]() Transparency and Saturation:
Transparency and Saturation:
Experiment with the transparency and saturation of paints. Apply them in different layers, creating interesting transitions and shades. This is especially effective when using watercolor.
![]() Brush Technique:
Brush Technique:
Try making various brushstrokes: dots, fan brushes, sponges, and other tools. This will give your underpainting a unique character.
![]() Mixing Paints:
Mixing Paints:
Mix different types of paints together. For example, add acrylic paints on top of gouache or oil paints. You will achieve amazing texture effects.
![]() Patience and Layers:
Patience and Layers:
Allow each layer of the underpainting to dry before applying the next one. This will help you control the texture and color shades.
![]() Experiment with Texture:
Experiment with Texture:
You can use sponges, brushes of different stiffness, and erasers.
![]() Play with Light and Shadow:
Play with Light and Shadow:
Work on creating contrast between light and dark areas. This will add depth and dimension to your underpainting.
![]() Mastering Wet-on-Wet Technique:
Mastering Wet-on-Wet Technique:
Explore the “wet-on-wet” technique, especially effective with watercolor. Applying paint to a wet surface helps create truly unique and distinctive artwork.
![]() Personal Style:
Personal Style:
And don’t be afraid to add something personal to the creative process. Your individual style and approach will stand out among many other artists. Finding yourself in painting is essential!
- Before you start, draw a preliminary sketch of how you envision your underpainting. This will help you avoid mistakes in composition and color distribution.
- Select paints, brushes, and other materials considering the characteristics of your project.
- Don’t forget to test colors to ensure they harmonize with each other and with the entire composition.
- Pay close attention to proportions and perspective to create a visually convincing image. This is especially important if you are working in the realism genre.
- Regularly take breaks and step away from your work. It’s important not to “overlook” potential errors or inconsistencies in colors and composition.
- Try to assess the quality of the underpainting at various stages. This will give you the opportunity to correct mistakes and make necessary adjustments to the future painting in a timely manner.
- Don’t be afraid to experiment and try new techniques. Sometimes, through mistakes, we artists find unexpected and interesting solutions.
A watercolor underpainting should stand out with its lightness and delicate hue, differing from the colors of subsequent layers due to the semi-transparent nature of watercolors. It’s important to consider this, as an overly saturated base can dull the upper colors and disrupt the balance in the artwork.
Lack of transparency is the main rule when it comes to underpainting with gouache. To ensure gouache adheres better, you can prime the painting surface beforehand, though it is not strictly necessary.
Oil underpaintings involve delicate, careful layers of thinned paint that lay evenly over a prepped surface. This process is most effective when you have ample time for the underpainting to dry completely.
Acrylic underpainting is an easy task, as this medium dries significantly faster than oil paints. Just add a bit of water to the acrylic to apply a thin, harmonious layer.
How do you know which underpainting is right for you? The advice is simple: just pick up a brush and try!
Conclusion
As you can see, underpainting is not just an artistic technique, but a true “art within art.” Underpainting allows you to play with light and shadow, adding depth and volume, making artworks as expressive as possible.
You can work with underpainting in various styles and art directions — from realism to impressionism, from classics to contemporary art — underpainting finds its place everywhere, giving each work a unique character.
The fascinating technique of underpainting becomes a sort of key to creating great paintings that captivate our imagination and leave an indelible mark in the history of art.
Whether you choose to master the technique of underpainting and incorporate it into your works is entirely up to you.
Question-answer
Underpainting is a thin, often monochromatic layer of paint applied to a canvas or other surface before the main work of painting begins. This term is used in oil painting.
Underpainting serves many functions:
- Surface Preparation: Underpainting creates a uniform foundation, ensuring easier and more even application of subsequent layers of paint.
- Control of Tones: Underpainting also helps establish the overall tonal background of the painting. The artist can choose an appropriate underpainting color depending on the desired mood of the work.
- Speeding Up Drying: A thin layer of underpainting usually dries faster than thicker layers of paint. This feature allows the artist to start working on details and main elements of the painting much sooner.
- Improving Adhesion: Underpainting improves the adhesion of oil paint to the canvas surface and prevents paint from peeling off in the future.
- Experimenting with Textures: Artists sometimes use underpainting to create interesting textural effects on the canvas, thus adding extra visual interest to their work.
Firstly, underpainting is like a magical foundation. It prepares the canvas, creating the perfect field for the future masterpiece.
Secondly, underpainting is like a suit for the paints. It enhances their brightness, making the colors rich, as if the artist is turning their palette into a true fireworks display of colors.
Underpainting helps the paints adhere better to the surface, preventing flaking or peeling. It creates a uniform background, eliminates unevenness, and provides a better base for the image.
A good underpainting can even protect the canvas surface from the effects of acids and other harmful substances, which affects the durability of the painting.
- Wet Underpainting: In this method, the artist uses diluted paints to create a base for the subsequent layers of paint. This allows for more precise tonal adjustments in the painting.
- Dry Underpainting: In this case, the artist applies diluted or undiluted paints to create an initial layer that will serve as the foundation for all subsequent layers.
- Brushstroke Underpainting: This method involves using a brush to create various strokes and textures to define the shape and volume of objects in the painting. Strokes can be applied in varying thicknesses.
- Mediums Underpainting: Mediums are used to alter the texture and consistency of the paints, allowing the artist to achieve specific effects in their work.
It is important to remember that underpainting is just the initial stage, and you are not required to follow this technique in all your works. The choice of underpainting method depends on the artist’s preferences and style.
- Decide what you want to depict. It could be a landscape, portrait, still life, or something else.
- Place the main elements of your future drawing on the canvas or paper. Determine which elements will be in the foreground and which will be in the background.
- Start with light and soft strokes. Don’t try to draw something perfect right away. This is just the preliminary stage.
- Refine the shapes of objects and add general details. You don’t need to worry about specifics at this stage—focus on the overall structure.
- Define the main light and dark areas. This will help create volume and depth in the painting even at the underpainting stage.
- Determine the color palette and overall mood of your painting.
- Look at your underpainting as a whole. This is the time to correct the main elements if something went wrong.
- If you feel like adding specific details or elements, do it at the underpainting stage. It can be done later as well.
Of course! It’s possible to paint with oil without an underpainting, but it’s an experimental approach that not every professional can manage.
An underpainting makes the artist’s job easier; it’s applied to the canvas before the main oil painting process. The underpainting creates a smooth surface, improves paint adhesion, and prevents oil from seeping into the canvas fibers.
However, some artists actually prefer to paint without an underpainting—such paintings often turn out unique and with a special charm.
Why would someone want to paint without an underpainting? This could be related to the artist’s personal style or a desire to paint more freely.
In the end, whether to use an underpainting or not is a matter of personal preference and creative decisions made by the artist.
After the underpainting, you can start adding colors to your work. Play with the palette, create rich and warm shades, and add light and shadow for volume.
Work on the details of your painting — detail the background, work on texture, highlight key elements, and don’t forget the small details of the painting.
Perfect the lines and shapes to emphasize movement and dynamics on the canvas.
Refine the painting, improve color transitions, smooth out details, and achieve balance in the composition.